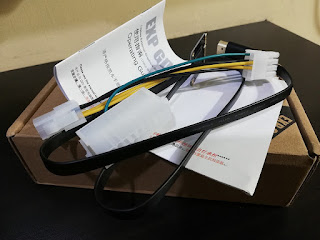
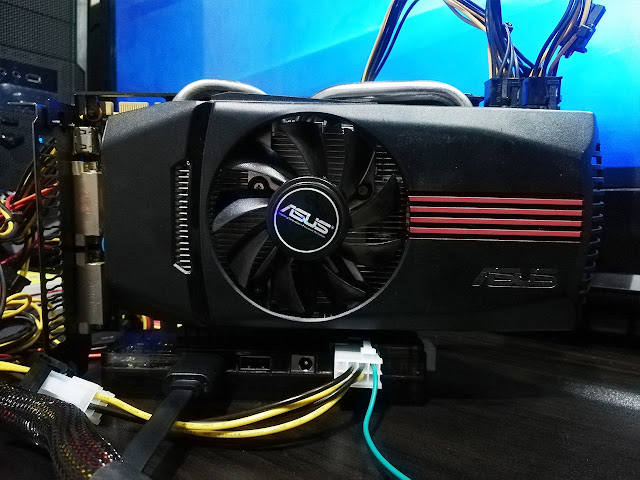
Do you have a laptop you want improve the gaming performance of, even at the cost of mobility? Or simply an old laptop you don't use anymore because it just can't run the apps and games you want? Then keep on reading as I'll be showing you how to connect a desktop GPU or video card to your laptop.
Disclaimer: Although this project worked for me, there is no guarantee that it will work for you as well. There are a hundred ways things can go wrong, such as incompatibilities and/or defects on both the hardware and software you have, so do this at your own risk. I will not be responsible nor be held liable if your attempt in replicating this project fails.
WHAT YOU NEED:
1.) Laptop with PCIe Port - if you don't know what a PCIe port is is, you can check your machine's manual or just look it up on YouTube like I did. Accessibility depends on the laptop- others will only need removing the bottom plate, while others require dismantling the entire keyboard area. The PCIe slot is usually taken by the wireless LAN card. Basically, we're taking away the Wi-Fi capability of your lappie, so better to have a backup Wi-Fi USB if you want to surf the net while using the external GPU.
3.) Dektop GPU / Video Card - the muscle that will add performance to your machine. I specifically bought a used Asus GTX 560 for this project for the good performance despite being sold for a low price.
4.) True Rated Power Supply Unit - this will provide power to run both the dock and GPU. Any kind will do since you won't be needing that much power anyway. 200 watts and above is recommended.
ASSEMBLY:
1.) Connect the GPU / Video Card to the Dock:2.) Connect the Power Supply Unit to the Dock (via 20-pin and 4-pin ATX):
3.) Connect the Power Supply Unit to the GPU / Video Card (6-pin PCI Express):
4.) Connect the Dock (HDMI) to the Laptop (PCIe):
SOFTWARE INSTALLATION:
If your laptop has a dedicated graphics card (usually identified with a separate NVidia or Radeon GPU in the laptop's specs), you will need to disable it first in the BIOS. Accessing a laptop's BIOS also depends on the brand and hardware, so please refer to your machine's manual or look it up online if you don't know how. There are also cases that the laptop has a dedicated GPU, but can't be disabled in the BIOS. If that's the case, I guess you're out of luck. It is crucial to disable the dedicated GPU.Also note that if your dedicated GPU in the laptop is the same brand as the desktop GPU you're going to use, then it's best to uninstall your laptop's GPU drivers first. To have a clean uninstallation, it is recommended to use DDU, or Display Driver Uninstaller. It's for free- just look it up on Google.
All good? Then you can now install your Desktop GPU's drivers by going to the official website of the brand of the card and searching for the driver there. In my case, I went to Nvidia's site and got the v391.35 for desktop, Windows 10, 64-bit, International. If everything's going well, Windows should detect your external GPU and then proceed to install the drivers without fail.
MINOR SETBACK
There's just one problem I encountered- I could get the external GPU to work but only by connecting a monitor to said GPU. It doesn't work when I use the laptop screen. I mean, the laptop screen works, but it doesn't utilize the external GPU when gaming. If there's anyone who knows how to resolve this, please advise in the comments section down below. Thank you. Okay, so from here on out we'll using an external monitor!BENCHMARK
The procedure has been done, and aside it needing an external monitor, it's a success! My money did not go to waste. Thank god. But now comes the real fight- just how much performance boost did my laptop get?To determine the numbers, we must first look at the laptop's dedicated GPU and the external GPU side by side: my old 2013 laptop is equipped with a GT 640M, and the desktop GPU we're using is a GTX 560.
Looking at the data here at userbenchmark.com, we can summarize that the GTX 560 is around 150% faster than the GT 640M. This is in terms of effective speed, average user bench, as well as peak overclocked bench. Jargons aside, we can safely say that gaming performance should drastically improve with the GTX 560.
To test out these numbers, we'll be trying out a couple of benchmarks and games, and then compare their FPS side by side. The following are the apps we'll be using to benchmark both GPUs:
1.) Unigine Heaven
2.) Cinebench
3.) FurMark
4.) Resident Evil 7
5.) Mirror's Edge: Catalyst
6.) Nier: Automata
7.) Final Fantasy XIV
After the arduous benchmark process, we now have the following results:
For the GT 640m, we have an average FPS of 25.5 frames per second, while the GTX 560 has a significantly better 56.2 frames per second. Overall if we base the computation on the data we got, the GTX 560 boosted the laptop's performance to about 120% more. With this it'll be a pain to move your laptop around, but in exchange for mobility, you get a better gaming machine!
Here's another comparison with one of my benchmarks using Unigine:
P.S. If you're using GeForce 10 series like the 1060, 1070 or even 1080, the newer drivers don't work so you'll need to use old ones- version 376.33 worked for other people so you can try that. Unfortunately, if you have the 1050, don't bother, because it's incompatible.


0 Comments